 Owner Help Center
In most cases, you don’t need to manually resize your photos—our system automatically adjusts images to fit your listing. However, for best quality, we recommend:
For Windows & Mac Users:
For iPhone & Android Users:
If your image still won’t upload:
Need Help? Contact support if you’re having trouble uploading images to your listing.
For Windows Operating Systems:
Step 1: Right click the image that needs to be resized.
Step 2: From the menu, select Open with > Photos

Step 3: Click on the More option (3 dots) > Resize
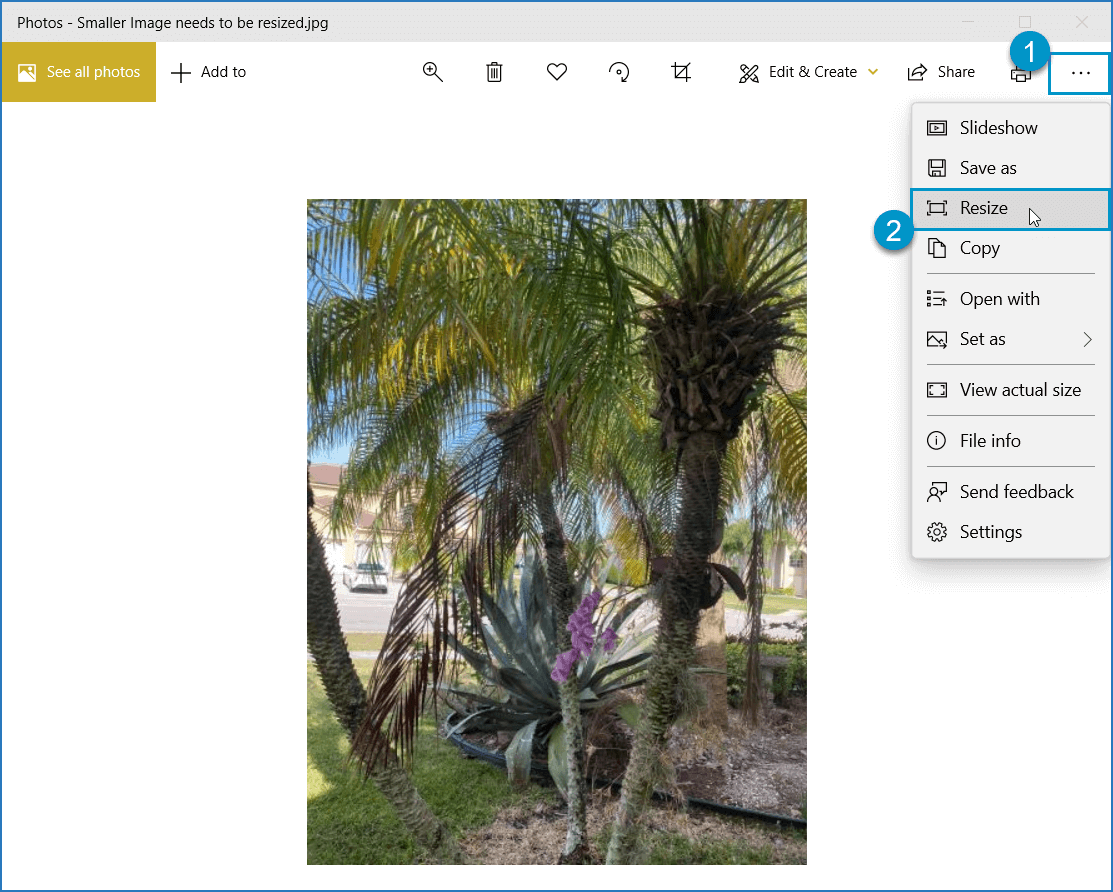
Step 4: In the resize image window, click Define custom dimensions
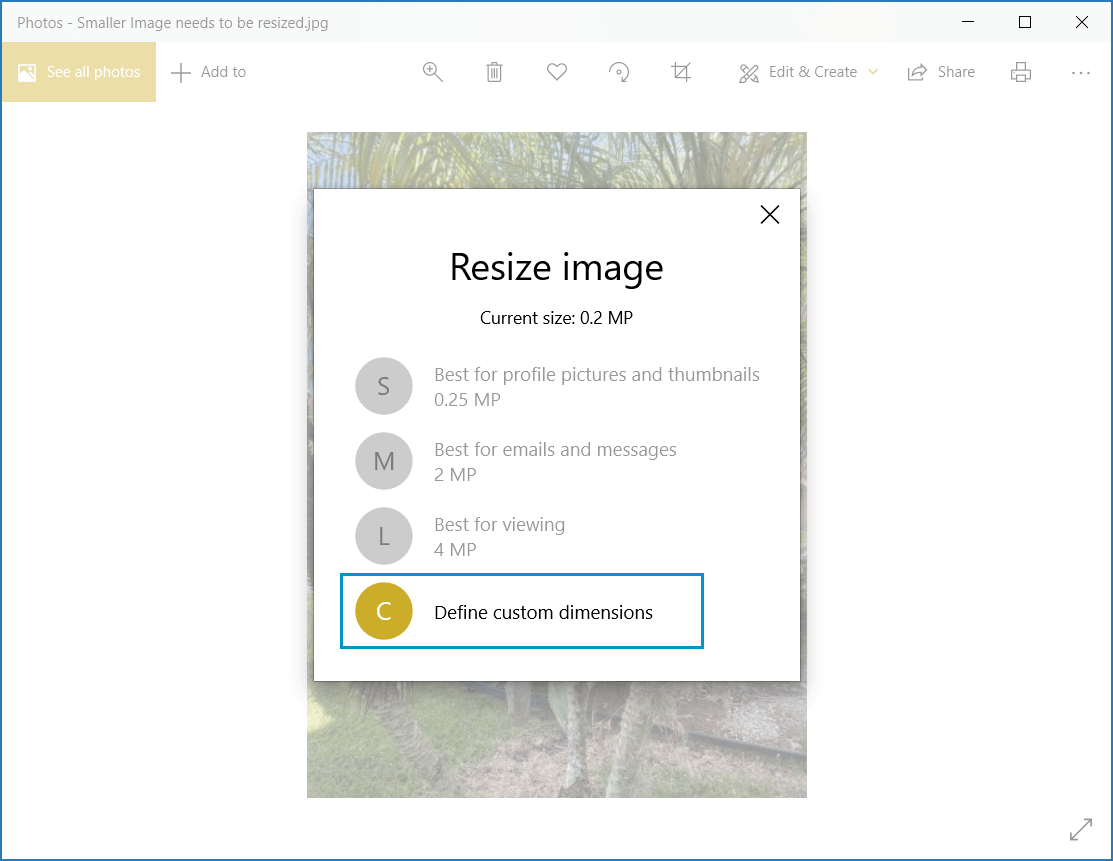
Step 5: In the Resize Image window, you can change the pixels for width and height. We recommend keeping the “Maintain aspect ratio” button checked, or you will have a distorted image after resizing. For “width”, enter 600, which is the minimum amount. Either width or height must be at least 600 pixels.
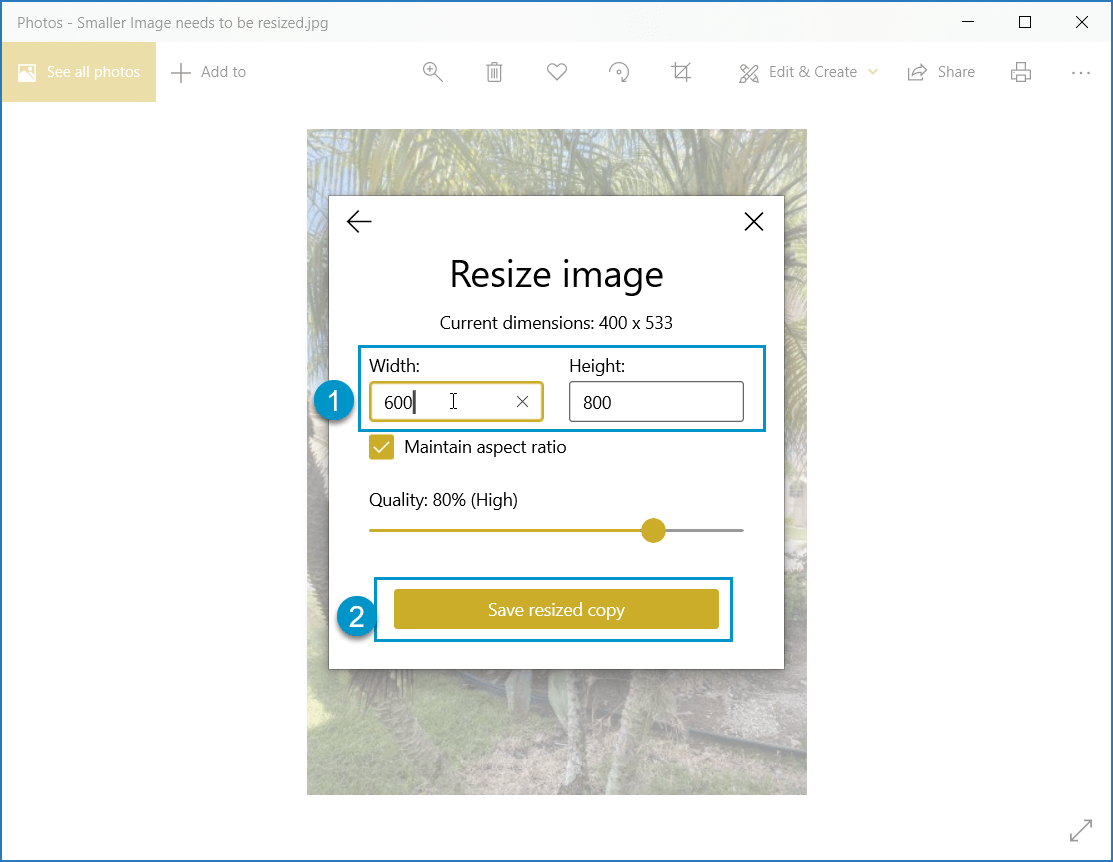
When resizing a smaller image to a bigger image, the end result may not be the quality and clarity you want. If the image is blurry or fuzzy after resizing, we recommend deleting, retaking the picture showing exactly what you want the user to see, and uploading a new image.
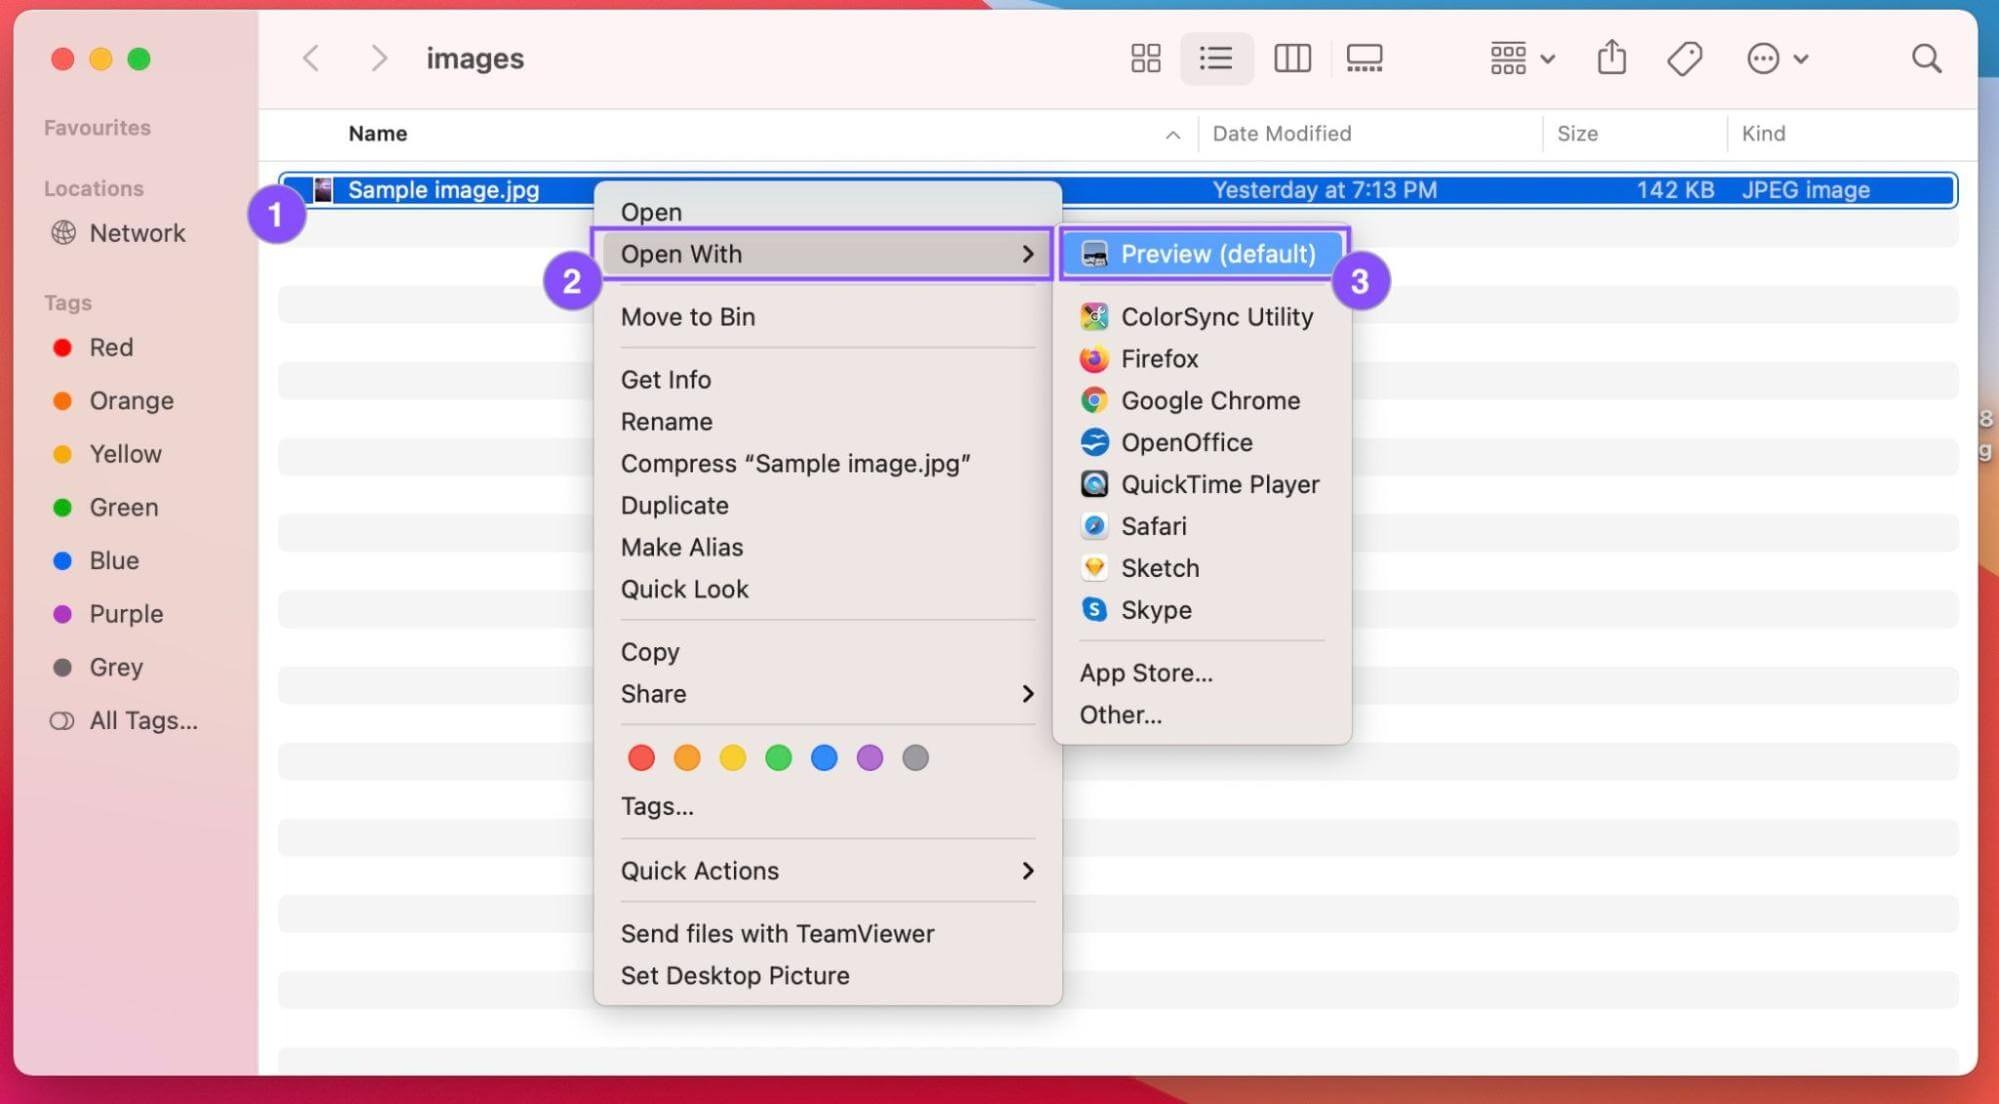
Step 1: Right click the image that needs to be resized.
Step 2: From the menu, select Open with > Preview (default)
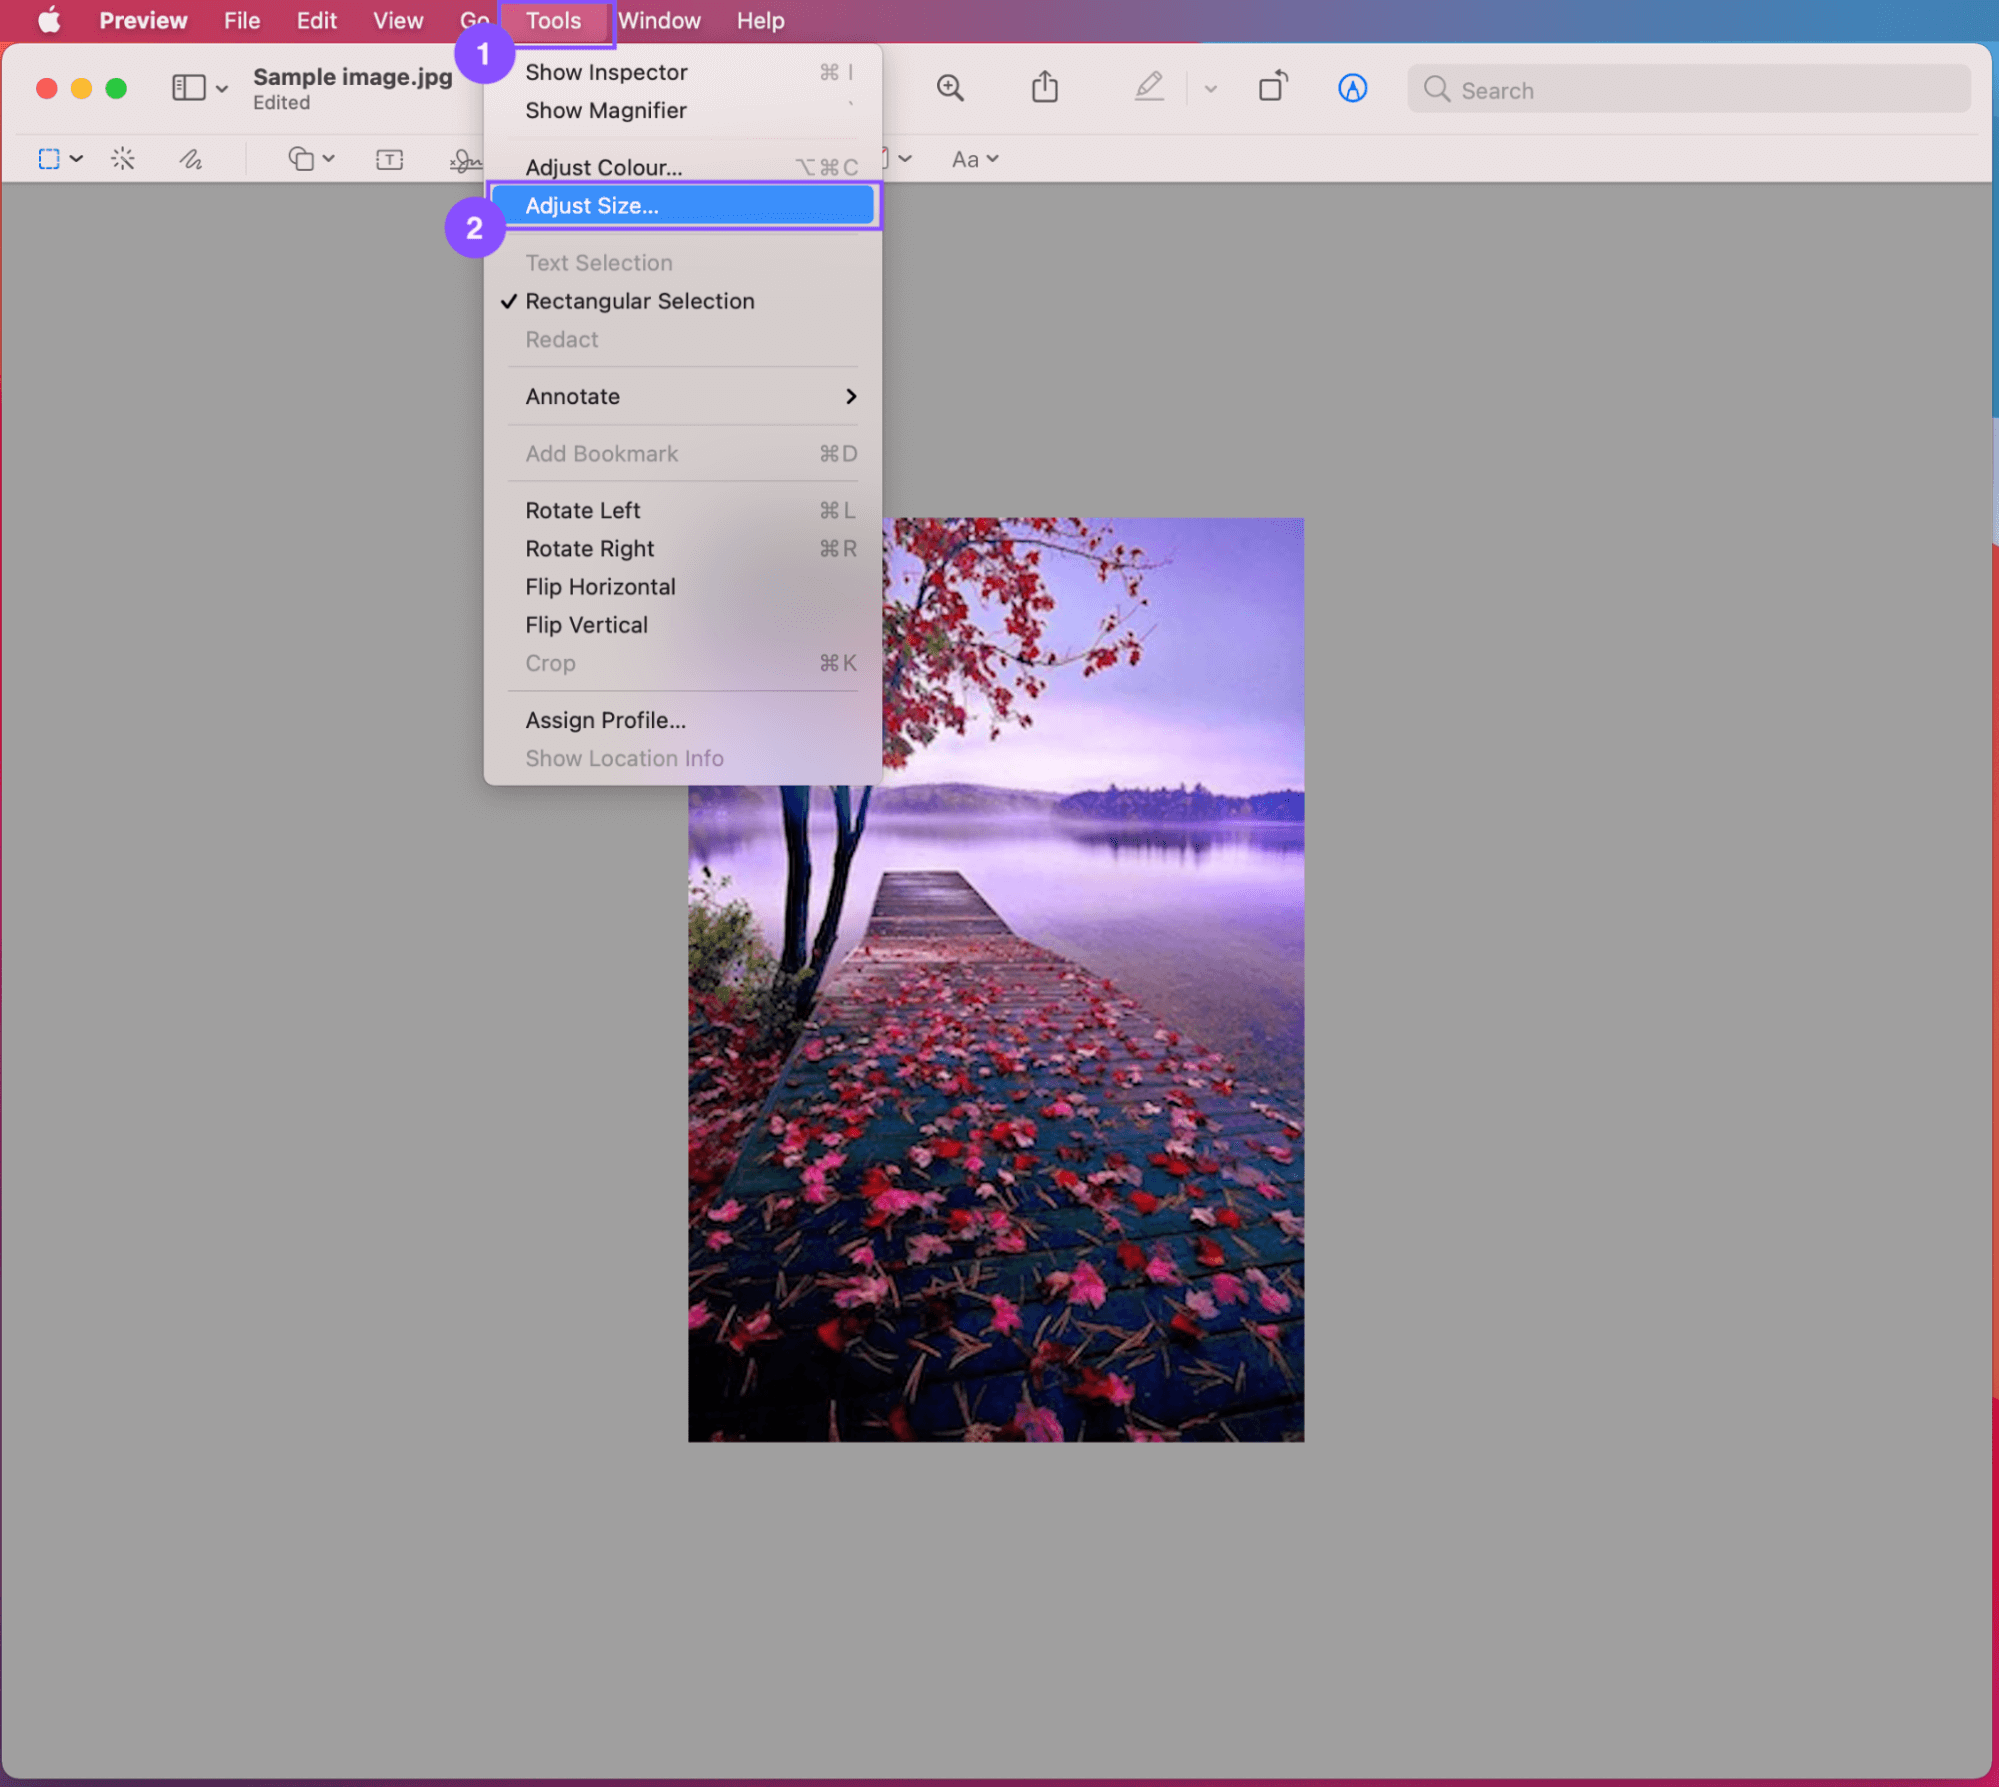
Step 3: Go to the Tools menu and select Adjust Size
Step 4: In the Adjust Size window, you can change the width and height. We recommend keeping the “Scale proportionally” button checked, or you will have a distorted image after resizing. For “width”, enter 600, which is the minimum amount. The width and height must be at least 600 pixels.
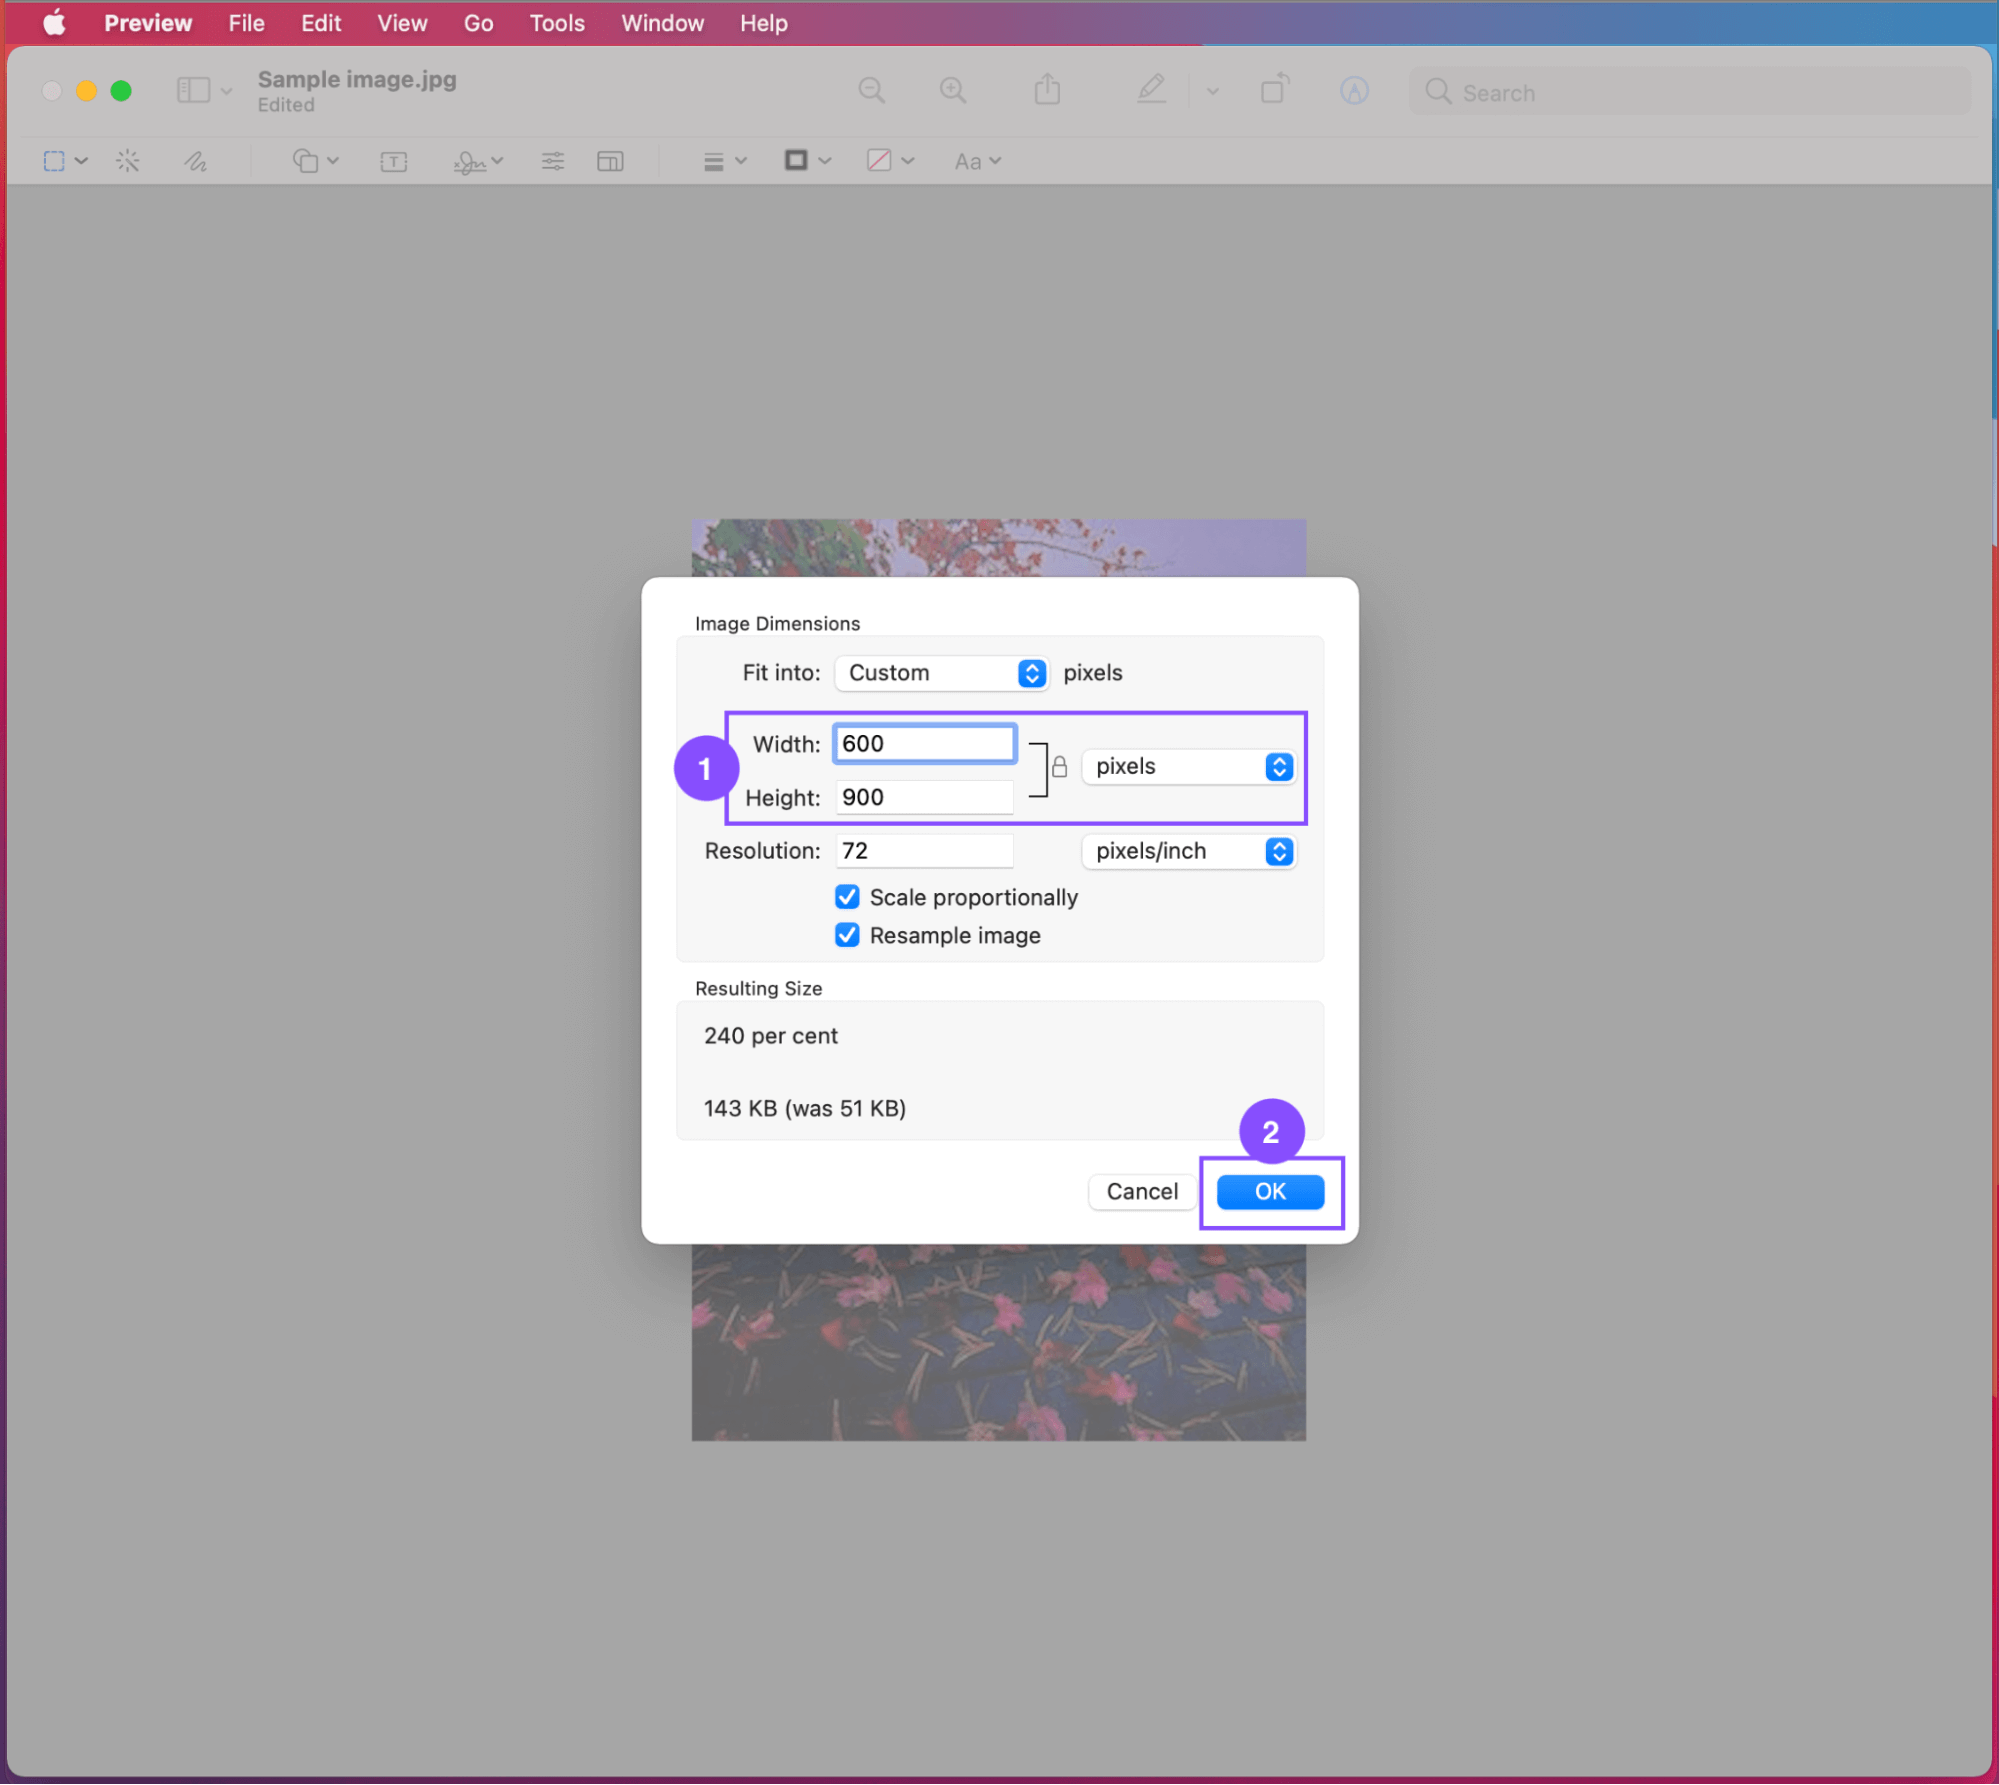
Click OK to resize the image.
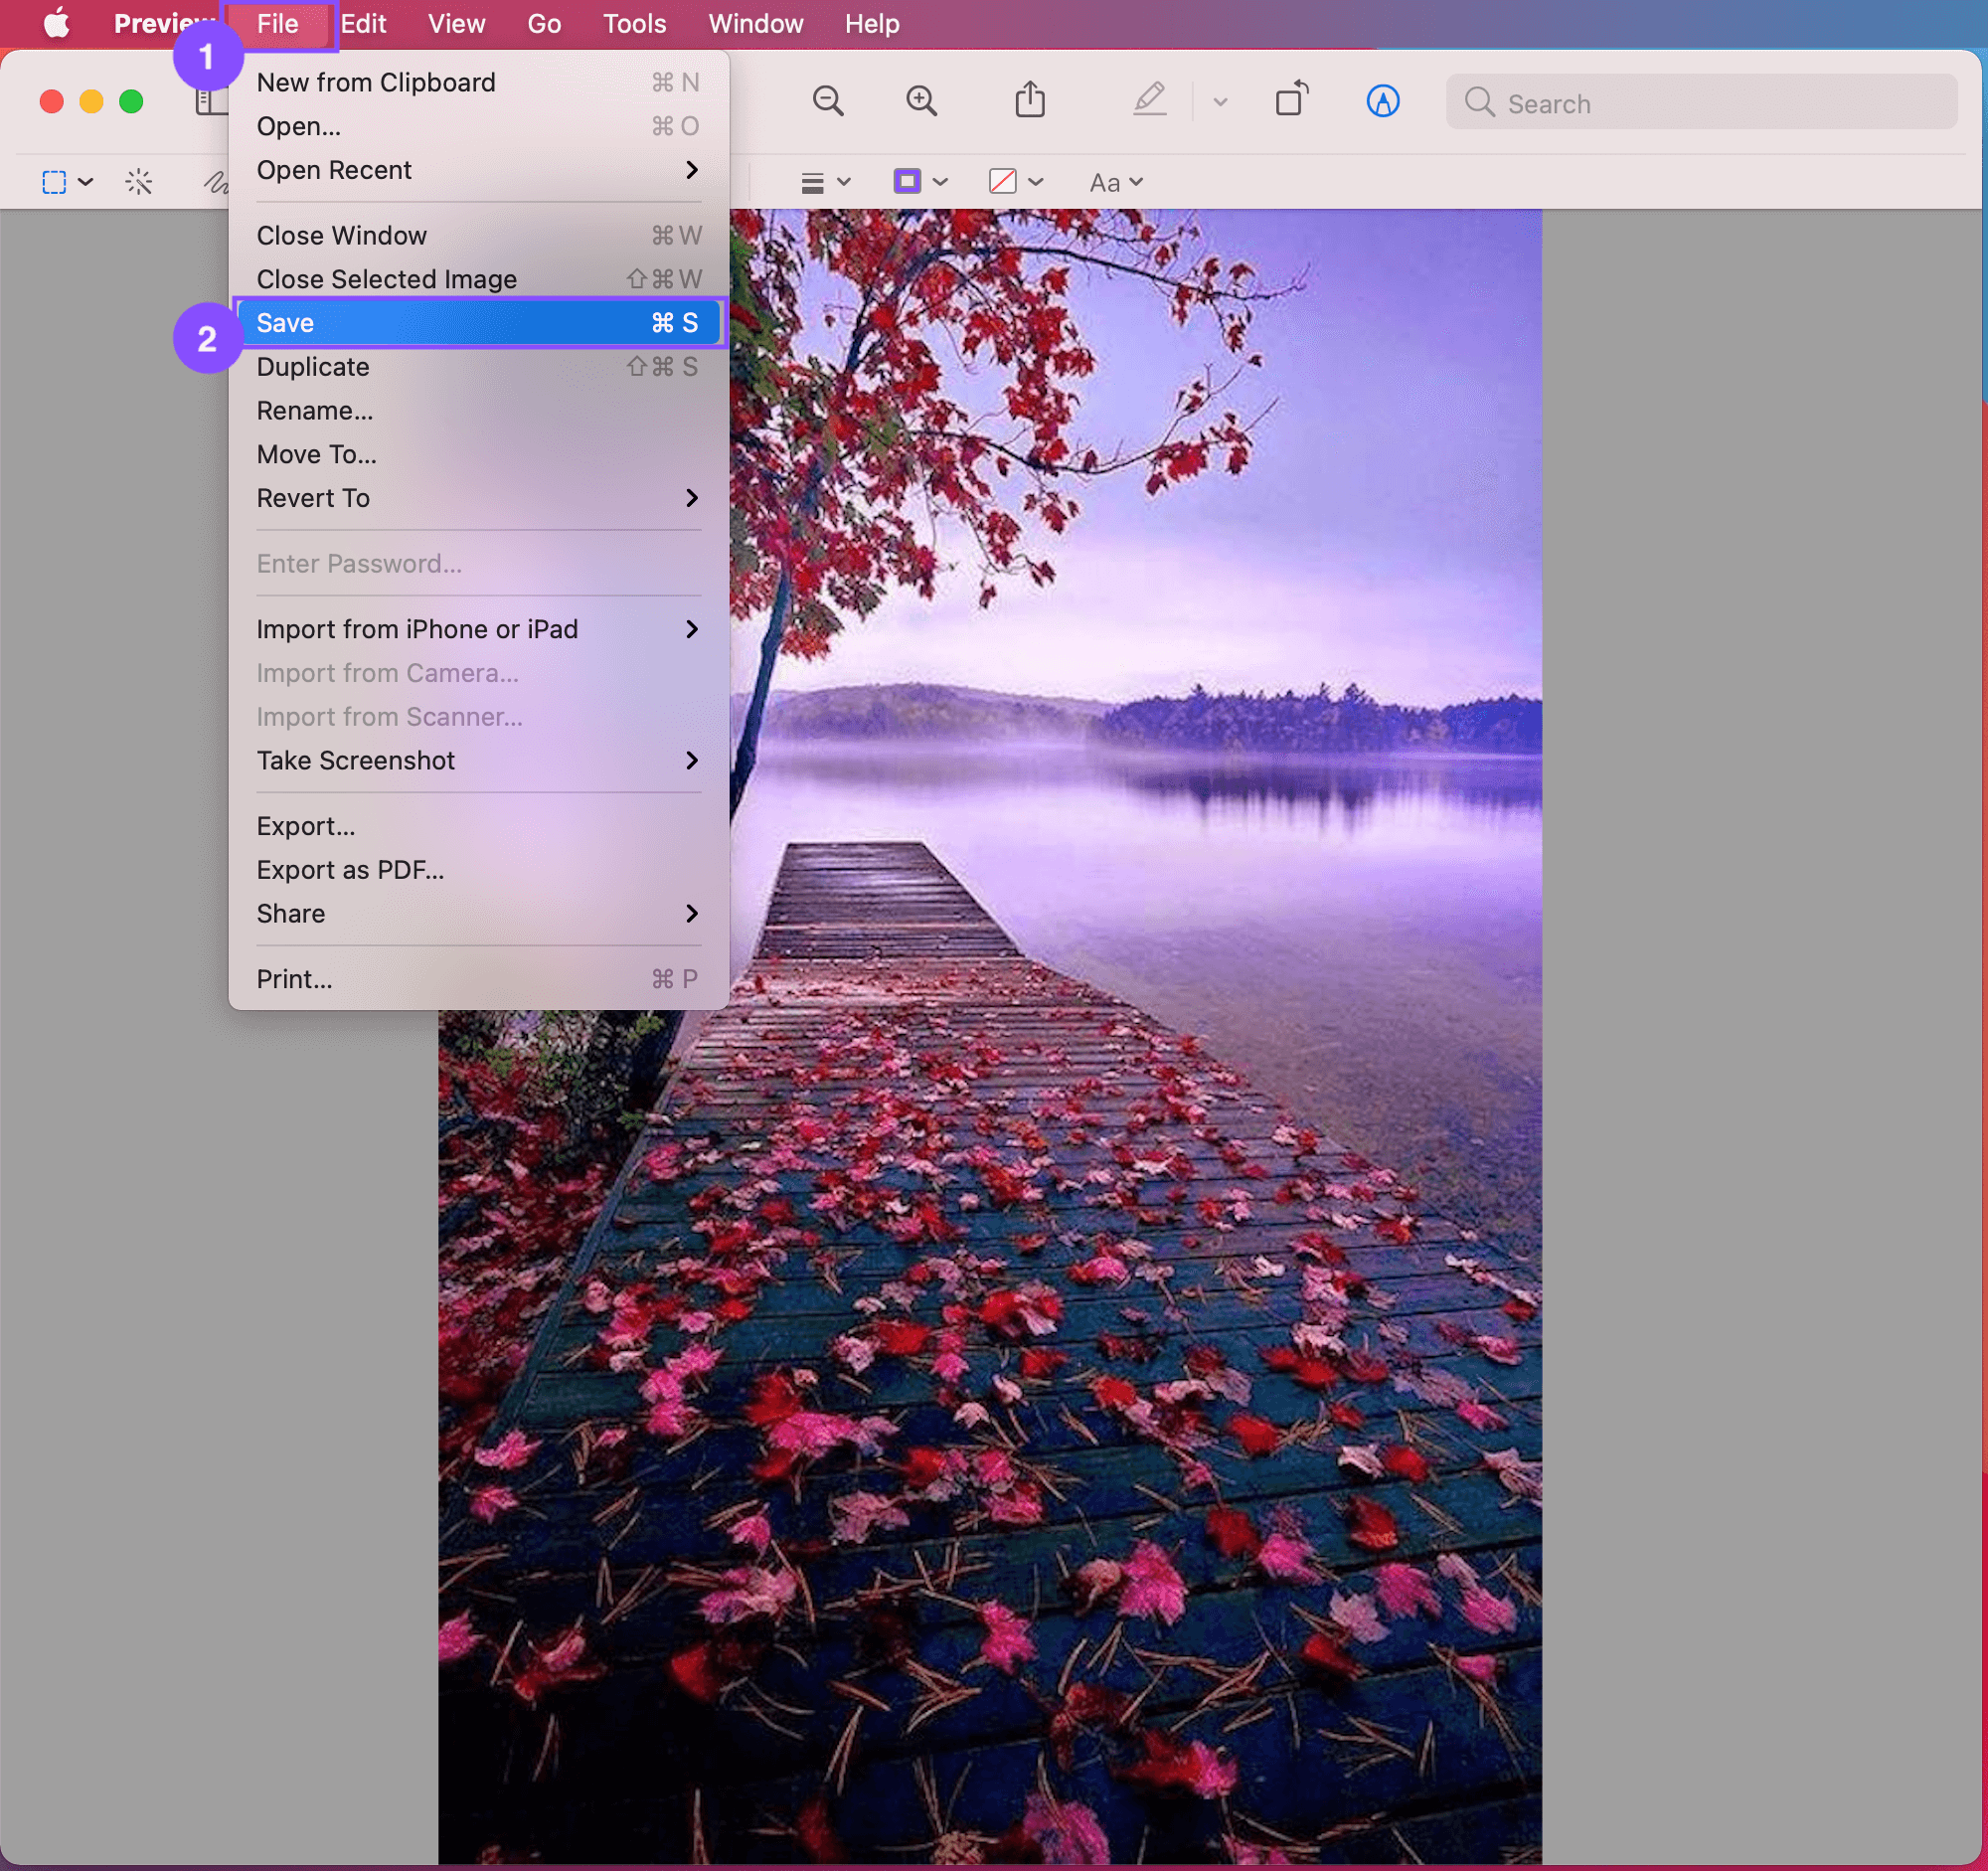
Step 5: Go to the File menu and select Save. That overwrites the image with a new adjusted size. Now the image is ready to upload to your listing.
When resizing a smaller image to a bigger image, the end result may not be the quality and clarity you want. If the image is blurry or fuzzy after resizing, we recommend deleting, retaking the picture showing exactly what you want the user to see, and uploading a new image.
Property owners can add as many photos as they would like on AffordableHousing.com. Here’s how to add photos to your listing:
1. Log in to your AffordableHousing.com account and create a new listing or select an existing listing for which you want to upload photos.
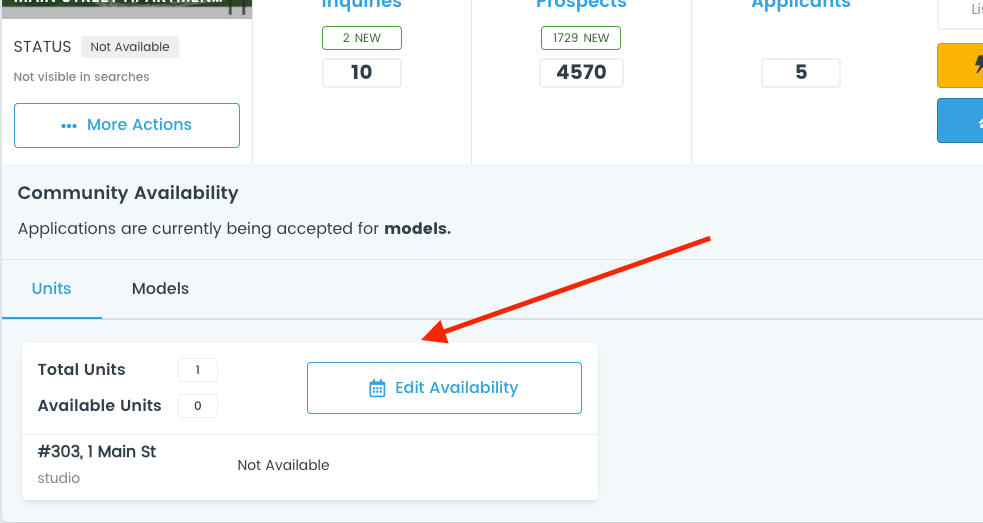
2. Click on "More Actions" and then go to Step 2 "Property Photos".
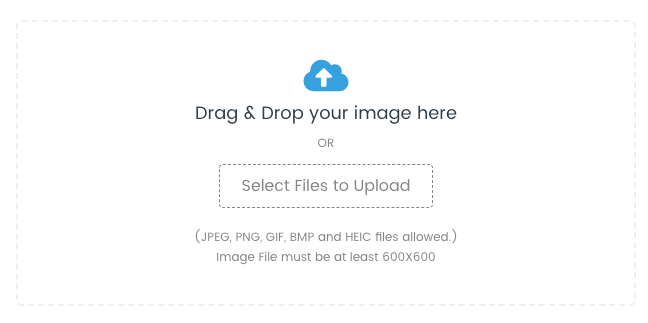
3. Click on the designated area or blue button with a + to start the photo upload process. This will open a file browser window. You can also drag a photo from your file browser and drop it into the upload area.
Tip: Select multiple photos at once by clicking on them while holding the Ctrl (Windows) or Command (Mac) key.
4. Once you've added your photos, you can preview the uploaded photos within the listing by clicking on the eye symbol.
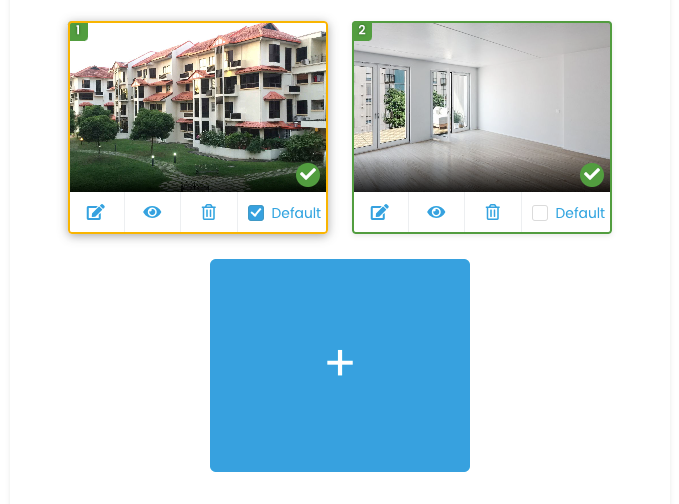
5. Rearrange the photos by clicking on the image and dragging to move it into the desired order.
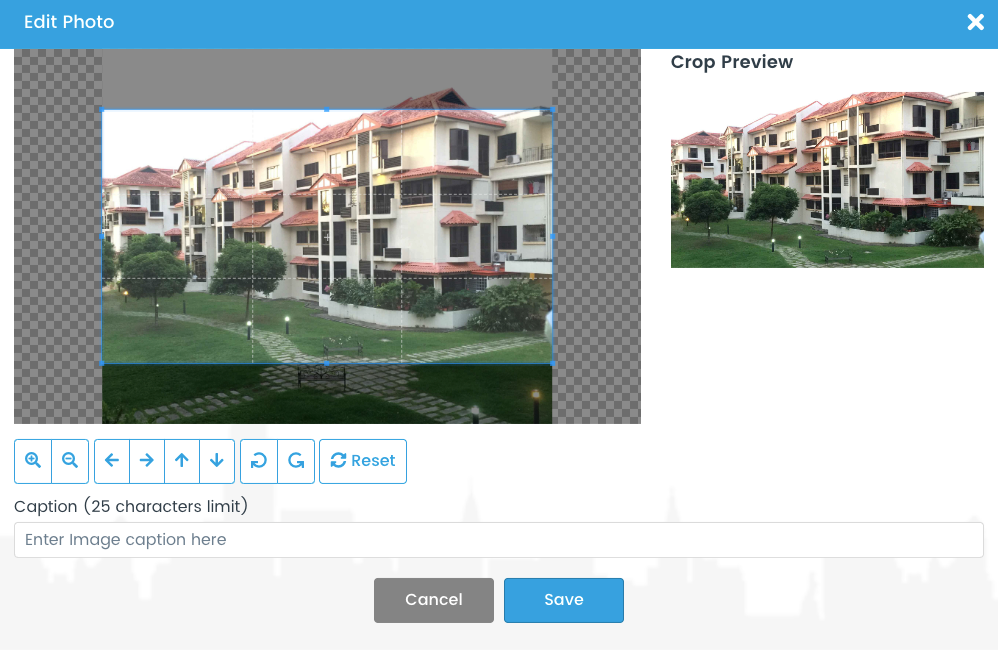
6. If needed, edit your photos by clicking on the image of a pencil. In the photo editor, you can add a caption, zoom, move, flip and resize the image. Press "Save" when you are finished editing.
7. Once all photos have been added and edited, click "Save and Exit" to make your photos visible to potential renters.
If you want to permanently delete a listing from AffordableHousing.com, select Other from the prompt when you set the status to Not Available. Then select the Permanently Delete Listing option. You will not be able to reactivate this listing or view its applicants again.
VIDEO
Step 1: Enter the basic details about your property, including the listing name, address, headline, and description. You'll also answer general questions such as whether pets are allowed and if the property has age restrictions.
Step 2: Upload photos of your listing to give potential renters a visual of the property. Listings with photos get more views and applicants than listings without.
Step 3: Specify the utilities and maintenance details. Indicate what utilities are available and whether the owner or renter is responsible for paying them.
Step 4: Highlight the community features and amenities. This includes security, accessibility, kitchen, bathroom options, and any other features your property offers.
Step 5 (for community listings): Provide details for the models and floor plans available within your community. For each model, enter the:
You can also upload photos for each model and specify the features available.
Step 6 (optional for community listings): Add unit availability if you want applicants to apply for specific units.
Step 7: Complete the affordability and incentives section.
Once you’ve filled in all the necessary details, click the Finish button. You’ll be taken to the pre-screening settings page, where you can add unique questions for applicants. Your new listing will then be added to your listings page.
VIDEO
Updating your listing status is essential for keeping potential tenants informed about the availability of your property.
Here's a step-by-step guide:
By following these steps, you can easily manage your listing's availability and keep potential tenants informed.
Yes, you can download the form as a PDF using the link below. Submit your listing manually by faxing the required form to (561) 416-9848. Once submitted, your listing will become active on AffordableHousing.com and your local housing authority’s website within 2–3 business days.
For assistance, call us at 1-866-466-7328. Please note, by submitting the form, you affirm that you are at least 18 years old and agree to the AffordableHousing.com terms of use and privacy policy, which can be found at www.AffordableHousing.com/terms.
Fields marked with an * are required.
